Building a Status Board with Calendar and Weather Info in JavaScript

When you’ve got lots of kids there’s a lot to remember each day. Sophie and I have a shared calendar to keep track of most of it, but a special thing are the birthdays of our friends and family. Many people probably use Facebook to remember them, but I am trying to move away from that, and also generally favor custom solutions which keep the information at a place I decide on my own.
That’s when I remembered I can develop websites.
It’s been a while since I did this professionally, since I run a web design company and have been employing people who are way better at this than I am for a long time. But from time to time I really enjoy writing a bit of ancient code that’s far from being pretty and concise, but works at least.
I first had the idea about a year ago and it involved getting an old 15 inch monitor and a cheap RaspberryPI computer. I built a little wooden case around it both, set up the PI with the standard Apache / PHP / MySQL / Chromium stack and got it to display a website on start-up. But this solution came with a few disadvantages.
- The case is too bulky to hang on a wall
- There’s no touch screen to do any manipulation on
- It requires some effort to keep the RaspberryPI computer running well, tinkering in the console takes up quite some time and it would just crash regularly
- As I had the first version of the PI, it was rather slow rendering the website – AJAX updates take a long time
So I threw it away, half-finished, and forgot about the whole thing for a while.
Then, a few weeks ago, I suddenly had the idea I could have had a long time ago: Why not just take a cheap tablet computer? Of course!
So I ordered a Huawei MediaPad T3 10, which has about 9 inches of screen and costs just 120 Euros new. (It’s so much worse than an iPad, though. I’m thinking about getting a used iPad and exchange it.) For now, it does the trick.
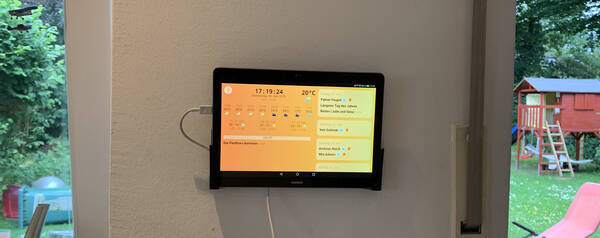
Nailed it on the kitchen wall, and the development began!
It took me about a weekend and then some little improvements here and there over a few weeks. In total I’d say it’s been about 20 hours of programming from start to current finished state.
What Information to Put on the Screen?
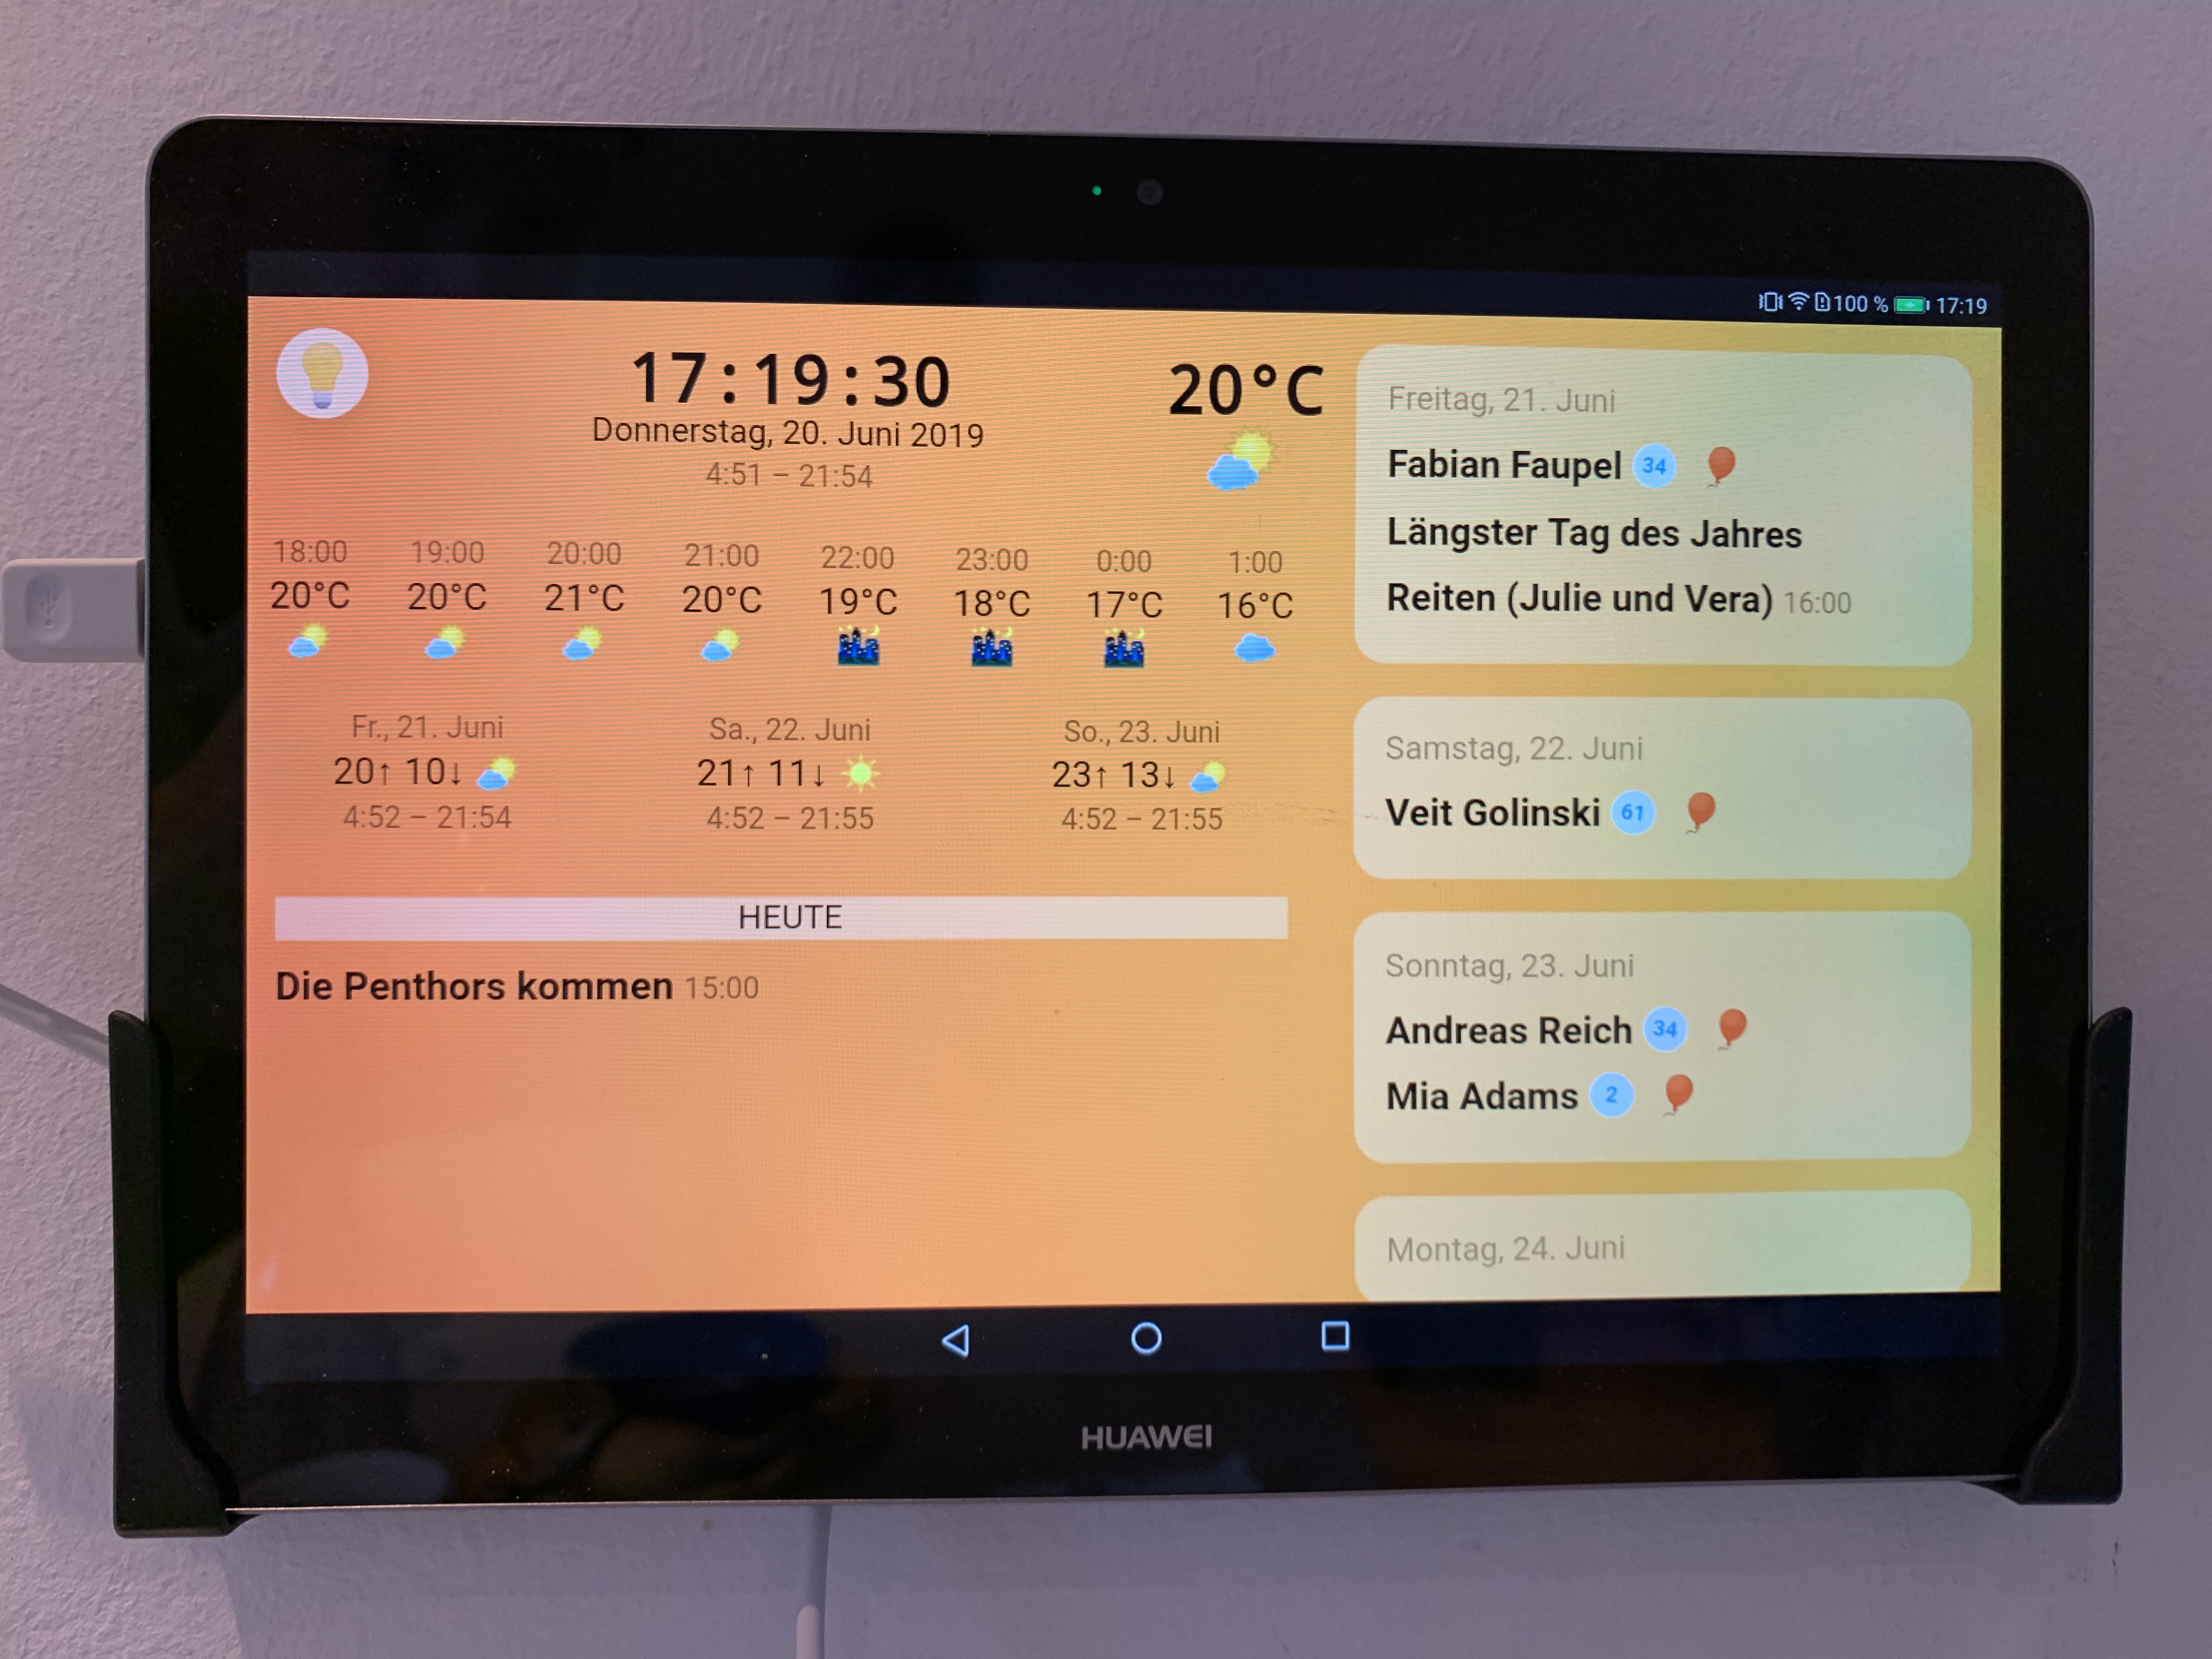
I started with some simple things. Current time and date. In JavaScript, that can be done really easily and really is a beginner’s task when you’re learning how to write code. I did it like this:
function timeDisplay() {var d = new Date();var s = d.getSeconds();if(s < 10) s = '0' + s;var m = d.getMinutes();if(m < 10) m = '0' + m;var h = d.getHours();document.getElementById('time').textContent = h + ":" + m + ":" + s;}
You then just need to call this function once per second so the time will get updated and look like a proper clock.
Getting the current date is quite similar, here you go:
var weekdays = ['Sunday', 'Monday', 'Tuesday', 'Wednesday', 'Thursday', 'Friday', 'Saturday'];
var months = ['January', 'February', 'March', 'April', 'May', 'June', 'July', 'August', 'September', 'October', 'November', 'December'];
function dateDisplay() {var dObject = new Date();var dWeekday = weekdays[dObject.getDay()];var currentDate = dWeekday + ', ' + dObject.getDate() + '. ' + months[dObject.getMonth()] + ' ' + dObject.getFullYear();document.getElementById('date').textContent = currentDate;}
Of course, this function can be called just once per day at 0:00 AM to display accurate info.
After that was done, I thought about what else would make sense to include. The weather! Fortunately, there are great weather data APIs around which are free to use when you don’t use them commercially. One of the best ones is called Dark Sky and is used by lots of the weather apps you might have on your phone.
Using a PHP call via AJAX once per hour, I call this API to get the current weather info for our location in Hamburg. It will return lots of data, of which I decided to use the following:
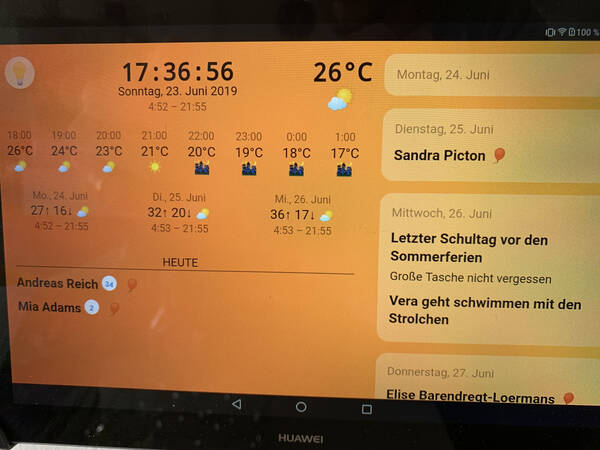
- The current apparent temperature (that’s the ”feels like” temperature) and an iconic representation of the current weather situation (rain, snow, sun, clouds, that kind of thing)
- The hourly forecast over the upcoming 24 hours. Again, containing apparent temperature and icon representation
- The daily forecast of the upcoming three days, containing the highest and lowest temperature each and the icon as well as the time of sunrise and sunset
- For the current day, I also read out the sunrise and sunset time and put it underneath the date display
The API offers 1,000 calls per day for free, so I figured calling it once every full hour should be working out. 976 free calls left to have fun with.
The icons I used for the weather representation are basic unicode emojis, which are part of every device / browser these days. As the Dark Sky API returns the icons in strings like “partly-cloudy”, I could also just replace those strings with custom made pretty icons, but for now the unicode ones suffice.
As Dark Sky returns the temperatures as Fahrenheit, I was required to write a little conversion function, which is also very easy to do:
function convertFtoC(temp) {return Math.round((temp - 32) * 5 / 9);}
Wake Up!
So far, so good. When testing the display which these already quite helping information, I noticed how the Huawei tablet goes into sleep mode from time to time. Obviously, for an always-on status board that’s not very helpful. If you hook it on the cable, this behavior doesn’t stop. Just after activating the developer mode in the settings, the situation improves. This can be done on Android by tapping the serial number 7 times in a row in the About tab of the settings. What a weird idea. Also, it all just looks like a cheap and ugly version of iOS. I really should have gone for an older used iPad instead. 🙄
So, after activating that mode, the screen will stay turned on forever, but it will go into low light mode after an amount of time you can configure. This can’t be changed to “never”. The largest amount of time is 15 minutes.
So, I need some sort of hack.
For a different project a few years back I wanted to achieve the same thing. That was a 7 Minute Workout app, but built as a website to open on your phone. The code just contained a few timers which would announce the workout tasks in a row. “High knees running in place!”
Sure, when the phone would go into sleep mode after a shorter period than 7 minutes, the workout would fall short. Back then it was possible to trick iOS by setting up a hidden reload of the website for every second and then stop that reload immediately. iOS thereby thought there’s some user action going on and kept the display lit up until my timer would stop doing that hidden reload after the 7 minutes were completed.
Unfortunately, the guys at Apple fixed the problem. And it’s still not possible to tell the user’s browser in your code to keep the display on in a regular way.
There are official plans to implement this, called the Wake Lock API, but it’s very recent and far from done. No browser currently supports this except the developer edition with a user activated flag. That’s not practical, so I searched for a new hack and found one.
Enter nosleep.js.
This cool idea from the awesome David Walsh works like this: it creates a tiny video file, invisibly inserts it into the website and starts playing it.
This keeps the display lit up, because, as you might now from visiting YouTube on a browser on your phone, the screen will stay lit for the time the video plays. The only thing that needs to happen is one user interaction to start this hidden video. So I put in a little button with a lightbulb to activate and deactivate the status.
var noSleep = new NoSleep();var wakeLockEnabled = false;function noSleepActivate() {noSleep.enable(); // keep the screen on!wakeLockEnabled = true;sleepButton.style.backgroundColor = '#fff';}function noSleepDeactivate() {noSleep.disable(); // let the screen turn off.wakeLockEnabled = false;sleepButton.style.backgroundColor = '#000';}var sleepButton = document.querySelector('#toggleScreen');sleepButton.addEventListener('click', function() {if (!wakeLockEnabled) {noSleepActivate();} else {noSleepDeactivate();}sleepButton.blur();}, false);
In addition to that, I added a timer that will then turn off the trick at 22:00 in the evening and activate it again at 7:00 in the morning, conserving some energy at night.
The Calendar Events
During the first project with the RaspberryPI I tried using a Google Calendar because that used to be easy to integrate into a website and could be included into Sophie’s and my Apple Calendars as well. Since then, the Google Calendar API has changed quite a bit and requires a lot more effort to use for me. I tried it and gave up after a few hours of not having fun at all.
As a calendar is basically a really simple thing to write, I decided I’d do it on my own. I set up a standard MySQL database, importantly using the utf8mb4 character set instead of the standard utf8, created some columns for name, description, time, type, and interval of the events, and wrote the PHP to save and read these events.
I decided it would be cool to just load all events and assign them to the days of their occurrence for the upcoming 365 days. On the display, I could have the days show up as little boxes underneath each other with a scrollbar for that area, so it would be possible to swipe down and see the complete upcoming year.
Recurring events turned out to be a little challenging to write the code for, because I wanted to be able to save and show weekly, monthly, quarterly and annual events. So I did the MySQL query in a way that makes the dates of the the events rather easy to parse:
select
  *,
  date_format(duedate, "%Y") as y,
  date_format(duedate, "%m") as m,
  date_format(duedate, "%d") as d,
  date_format(duedate, "%Y-%m-%d") as ymd,
  date_format(duedate, "%m-%d") as md
from familyplanner
order by
  field(type, "birthday", "normal", "datetime"),
  field(`interval`, "once", "daily", "weekly", "monthly", "quarterly", "annually"),
  duedate asc
This way, I can create an array containing all upcoming 365 days, then cycle through that array and for each day cycle through all events and compare the dates to see if the event would be happening on the current date, like this:
foreach($days as $dayDate => $dayItems) {$days[$dayDate] = getItemsForDate($planItems, $dayDate);}function getItemsForDate($planItems, $date) {foreach($planItems as $planItem) {if($planItem['interval'] == 'once' && $planItem['ymd'] == $date)$returnItems[] = $planItem;if($planItem['interval'] == 'annually' && $planItem['md'] == substr($date, 5, 5))$returnItems[] = $planItem;if($planItem['interval'] == 'quarterly' && $planItem['md'] == substr($date, 5, 5)|| ($planItem['interval'] == 'quarterly' && ($planItem['md'] == sprintf('%02d', substr($date, 5, 2) - 3) . '-' . substr($date, 8, 2)))|| ($planItem['interval'] == 'quarterly' && ($planItem['md'] == sprintf('%02d', substr($date, 5, 2) - 6) . '-' . substr($date, 8, 2)))|| ($planItem['interval'] == 'quarterly' && ($planItem['md'] == sprintf('%02d', substr($date, 5, 2) - 3) . '-' . substr($date, 8, 2))))$returnItems = $planItem;if($planItem['interval'] == 'monthly' && $planItem['d'] == substr($date, 8, 2))$returnItems[] = $planItem;if($planItem['interval'] == 'weekly' && (date('N', strtotime($planItem['ymd'])) == date('N', strtotime(substr($date, 0, 10)))))$returnItems[] = $planItem;if($planItem['interval'] == 'daily')$returnItems[] = $planItem;}return $returnItems;}
I put all this into a separate file which can be called via AJAX again and will return the list of days containing all events. Calling it once per day at 0:00 AM, and done!
After playing with it for a while, I realized it would be more fun if the tablet would react a bit more often to changes in the calendar. When I put in a new event, it would be better if it showed up sooner than at the next midnight. So I just increased the interval quite radically from once per day to every 10 minutes. After all it’s not much work to do for the web server to load and sort the stuff from the database.
And that’s basically it.


Little Improvements
When entering all the birthdays I wanted it to display, I had a few ideas about improving that procedure. Those were little things like:
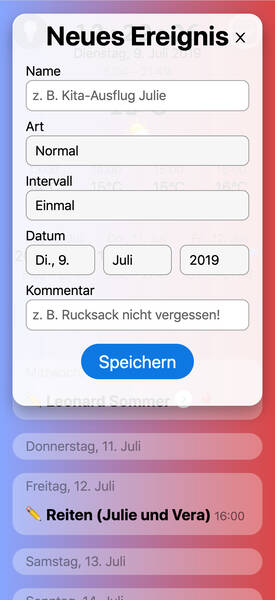
- When selecting “birthday” as the event type, automatically set the interval menu to “annually”, and also calculate the age of the person to display it next to the name in a little bubble.
- Only show the time selector when the special type “event with time” is selected.
- When a new date is selected, load the events that will happen on that date so you can easily see if, for example, the birthday has already been entered.
- Pre select the current date.
- Populate the date’s day select with the weekday names whenever a new month or year is selected.
- Show prettier error messages in case the API servers aren’t reachable or return an error for some reason.
- And from time to time, I do some graphical changes as well. Freshen up the thing.

I published all of the code on GitHub if you’d like to see it complete or maybe even implement your own version of it. A few programming skills will be required, though. Here’s the Git Repo of the Family Board. Enjoy!
How do you feel after reading this?
This helps me assess the quality of my writing and improve it.
Leave a Comment